Electronic Reporting from Scratch part 3 Use of Parameters and Excel Format
In this 3rd part of the series, we are going to have 2 very different Cases, in the first case we’ll see how to deal with user input data, and in the second one we are going to learn how to work with Excel format in ER, using an exporting example. As always I am doing a how-to post below the video so you don’t have to watch the full video if you don’t want to.
User Input data in Electronic Reporting (GER)
In this first use case scenario, we are going to see how to filter our data based on an input parameter first and querying directly the Data Source later. The requirement set the need to be able to filter the data to be exported by the field Header Id of the FTDHeaderTable.
User Input Parameter
We need to go to the map model to data source, so we follow the steps described in the following images:
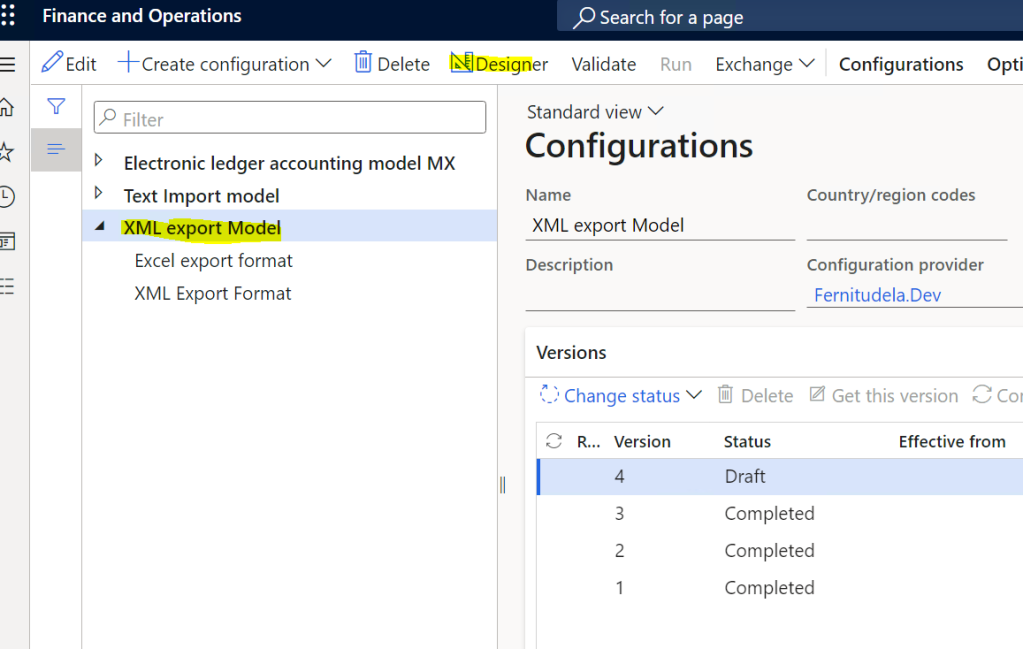
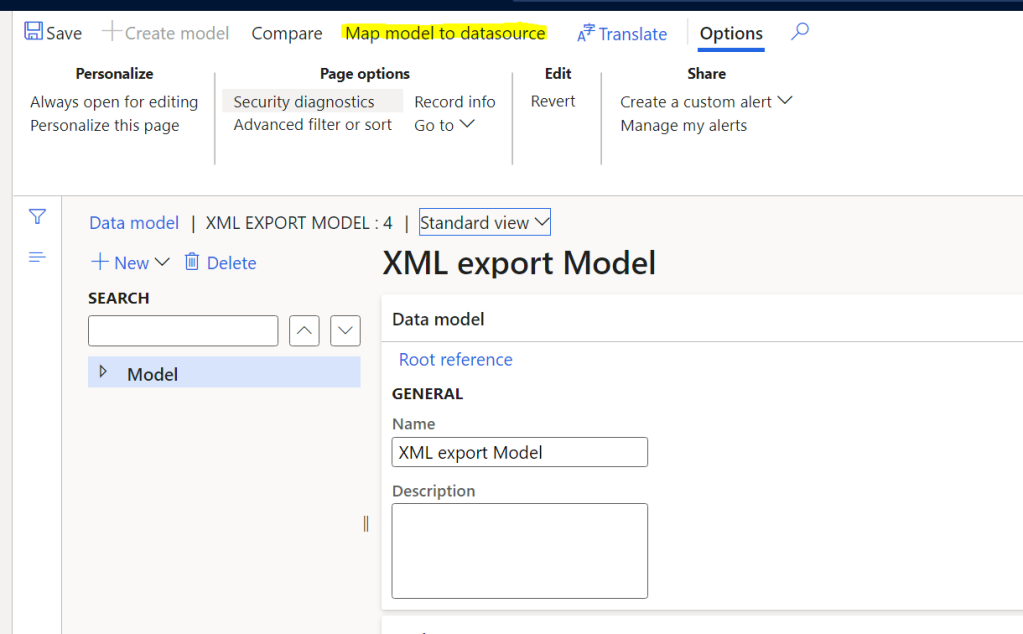

Now, we can add the User input parameter at the root level, clicking in the Add root with the User input parameter data source type selected.
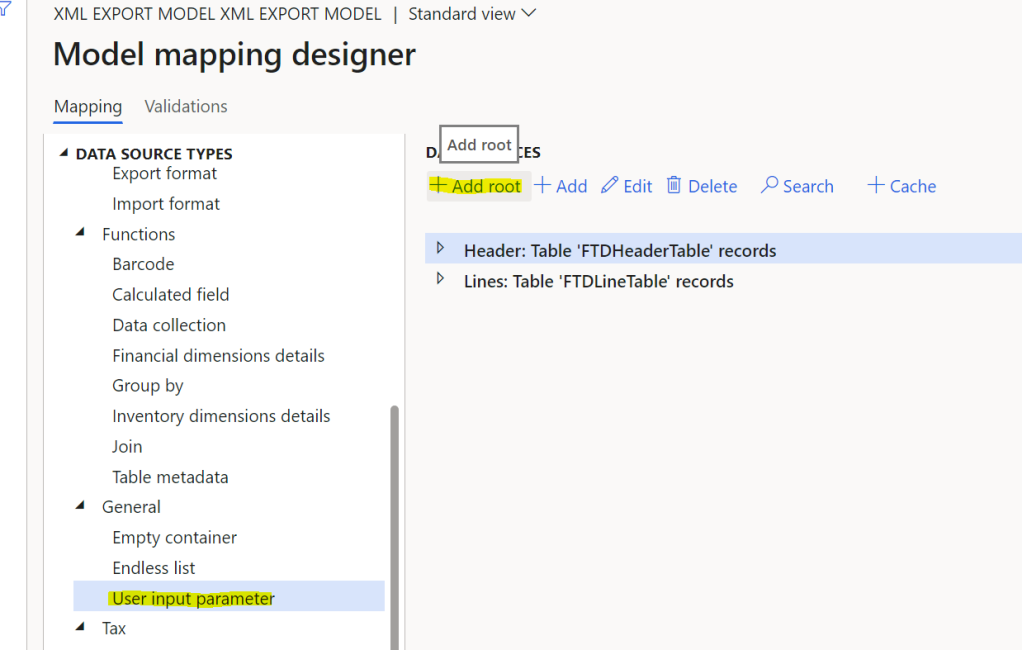
We should select the EDT, and we can describe a label too and many other self-explanatory parameters. In our case we select AccountNum because I didn’t create an appropriate EDT for it, and as a result later we are going to have the generic label Account Num, there is no need to say that this is not the correct way to do it… create the EDT and don’t be lazy!
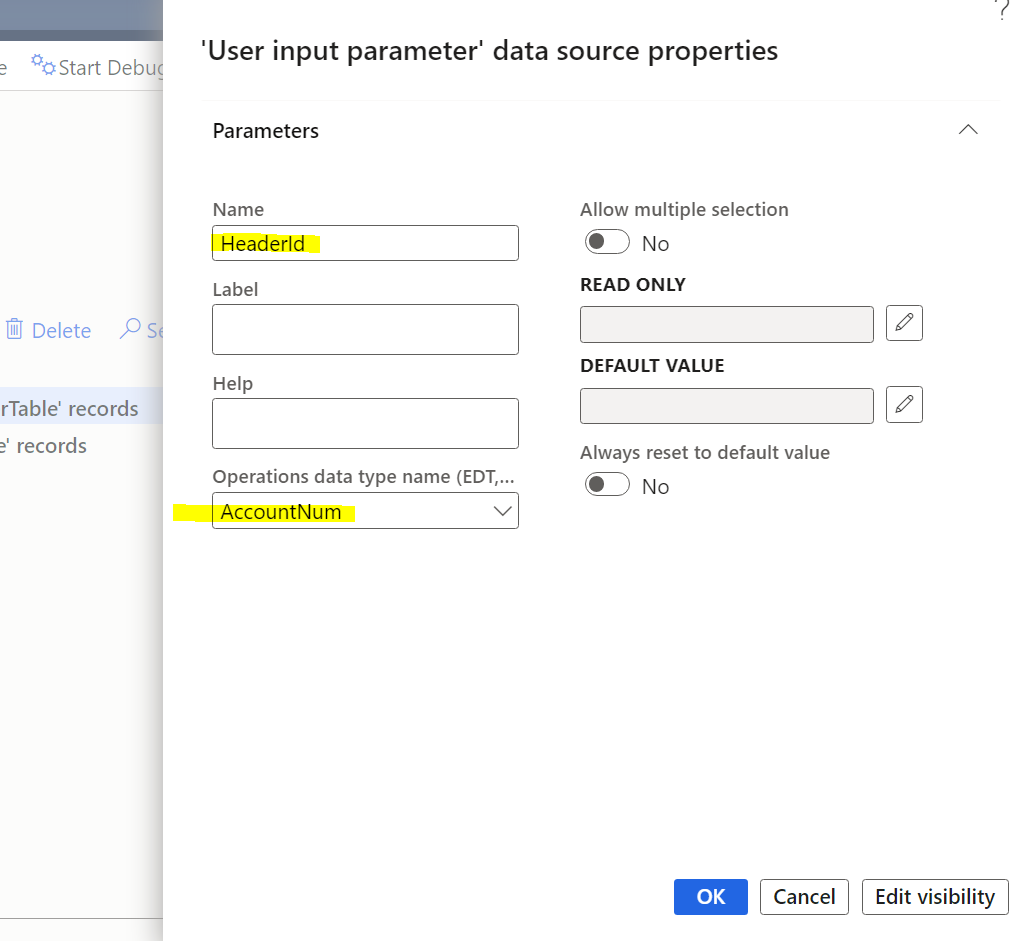
Once we have our parameter, we are going to use it in order to filter our Headers, creating a new Calculated Field:
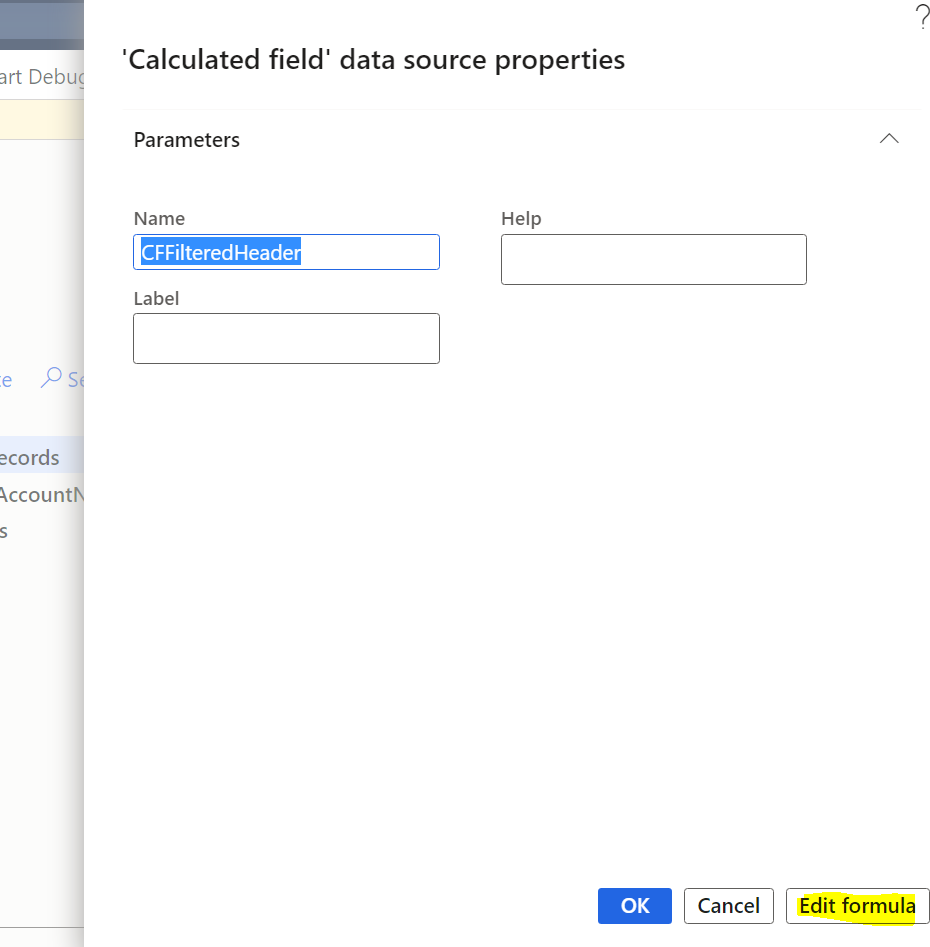
In the formula we need to put the following formula:
IF(HeaderId<>"", where(Header, Header.Id = HeaderId),Header)
This expression is going to filter the Headers only if a value is given to the parameter. And that’s it, our requirement is now accomplished. So, if we go back to the Model to datasource mapping and Run our ER, we are going to see now that it asks for the newly created parameter, and it will filter by it:
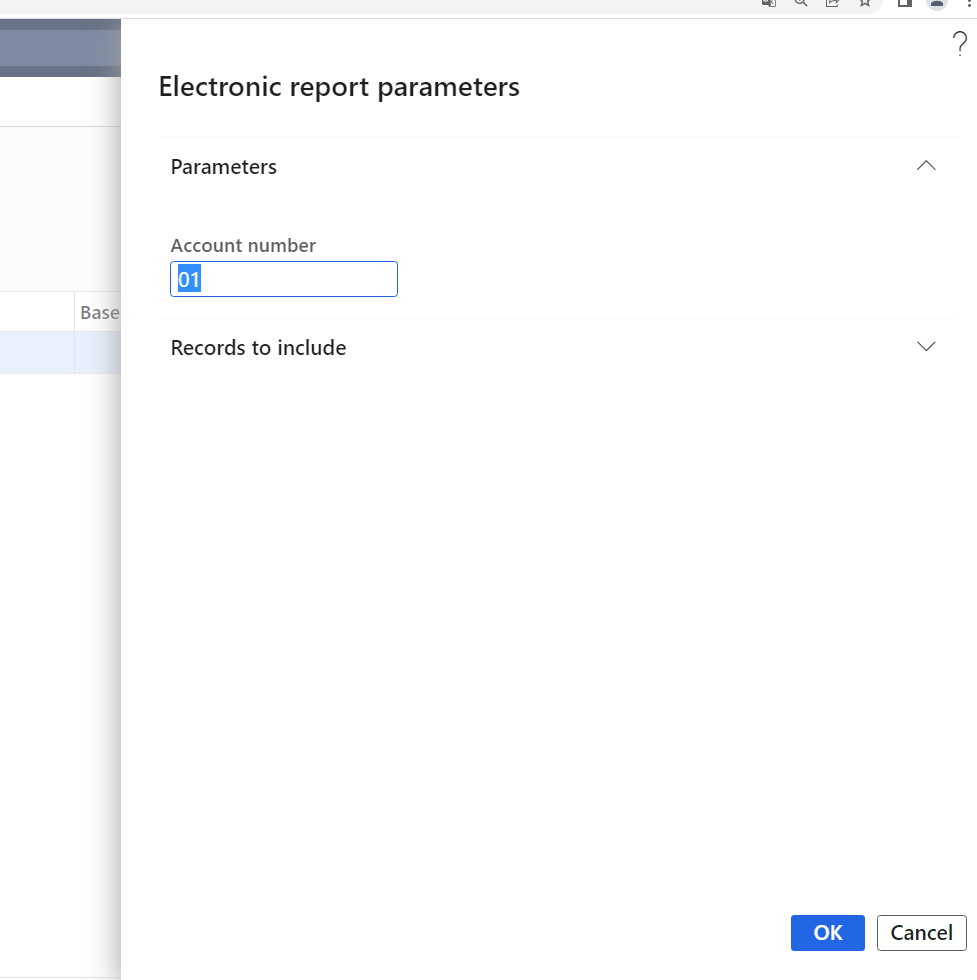
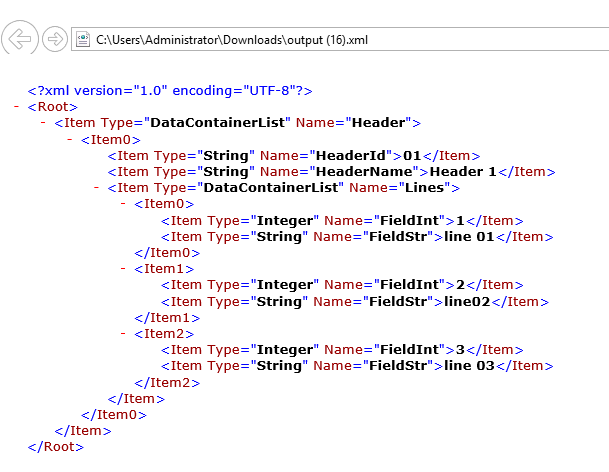
Et Voilà! However, we can match the same requirement another way even better, at least from my point of view, and that brings us to the next section.
“Query” the Table Records directly
The other option to match the requirement is to query the Table records directly. I think this is the best option because it is not using the WHERE function, that will filter the already queried table, but it filters before the SQL is executed; so it is a lot better in terms of optimization. The way to do it is simply checking the “Ask for query” parameter in the Table Records creation, or edition:
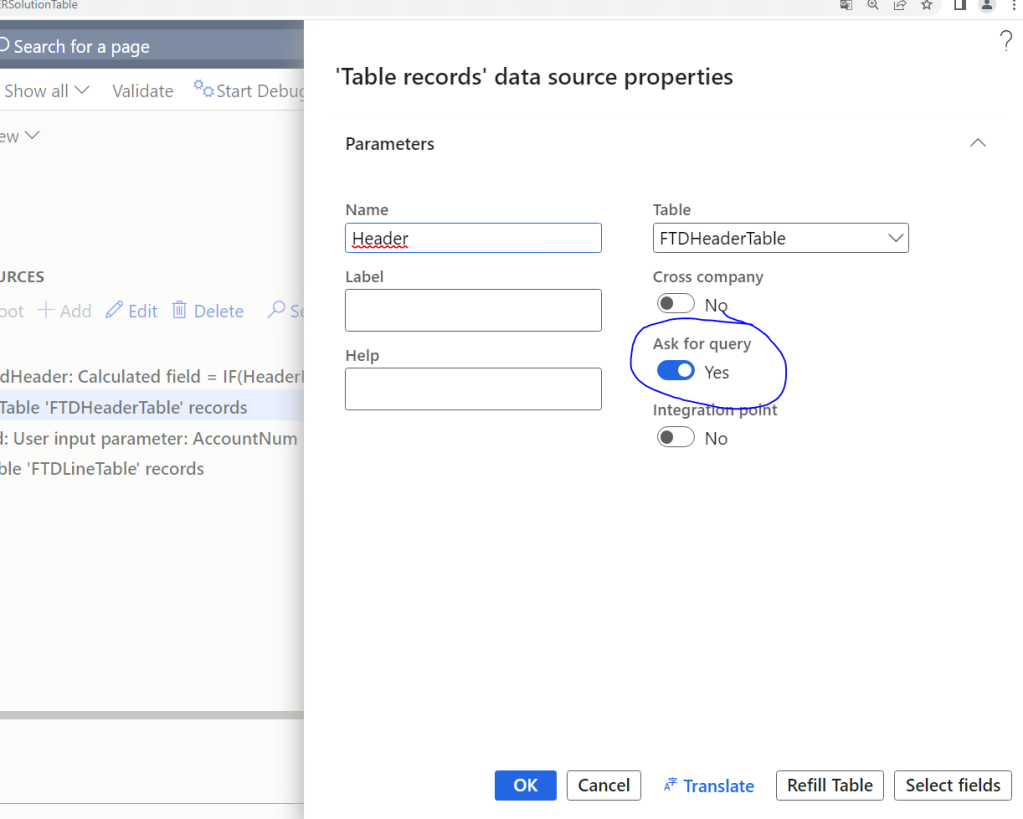
After doing this, you will see a Records to include tab automatically implemented in the prompt of your ER, so you can apply the filters directly to the data source:
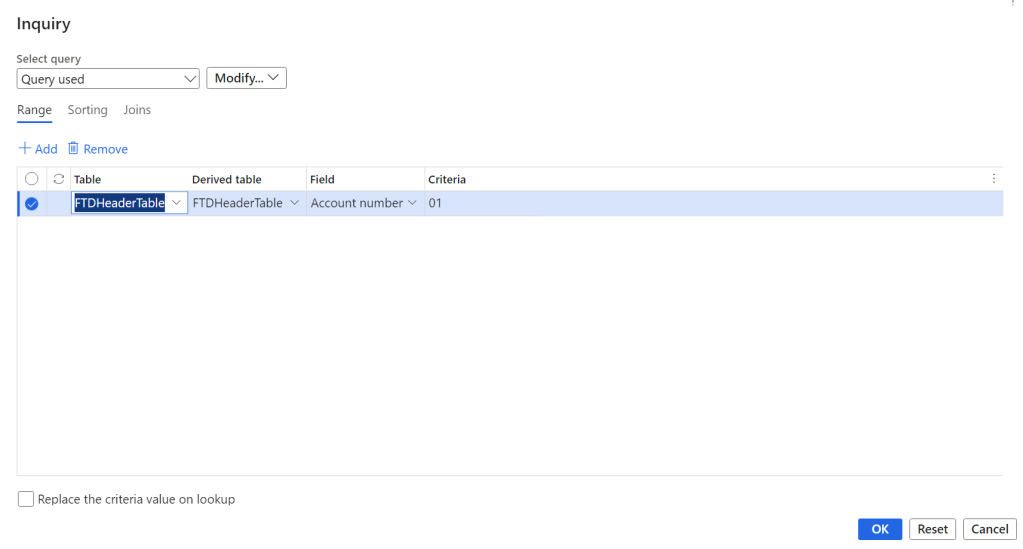
Besides, in our case, this will lead to the same result, those two functionalities can be used for many other different things, so I wanted to show you both of them so you can add them to your toolset.
Working with Excel format in Electronic Reporting (GER)
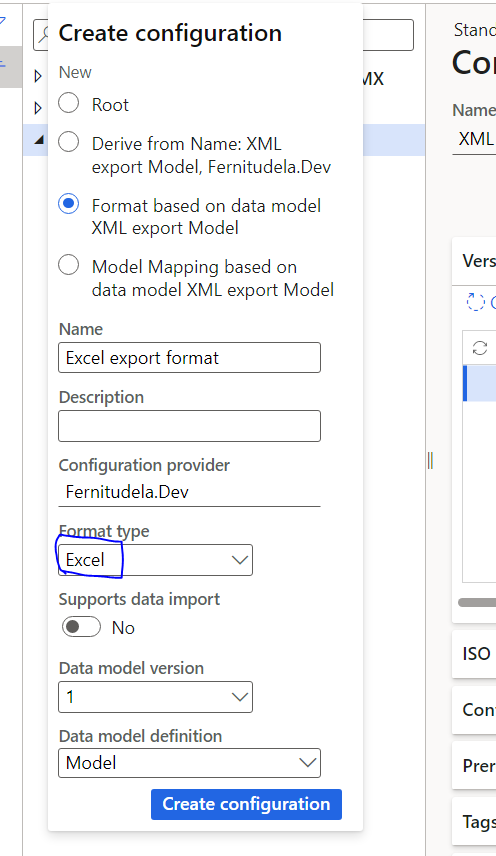
In this second use case we want to export the same information that we filtered in the first part but in EXCEL format instead of xml. For this we should create a new format based in the same model, fulfil the required information and put the format type to Excel… easy.
Now, let’s go to the designer and we are going to see that we have an Import option in the action pane, that will allow us to import an excel template. Therefore, what we need to know is how to make the Excel template, ours will have an structure like this:
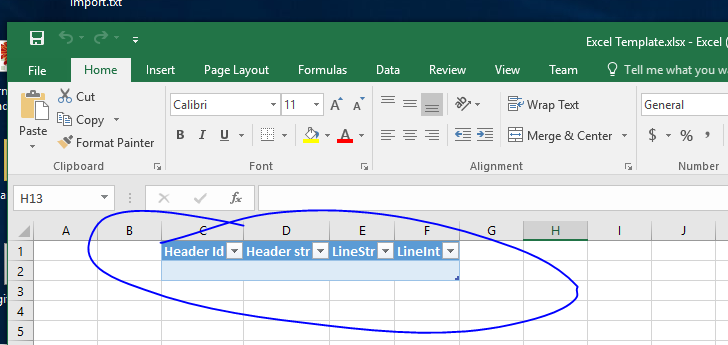
But if we create this excel and import it to our ER format, it’s not going to get the lines and the fields, because we need to add Ranges to it. We need to go to formulas tab in the action pane, select the range were we are going to insert our rows and define it with the name we want to use in the ER Format.
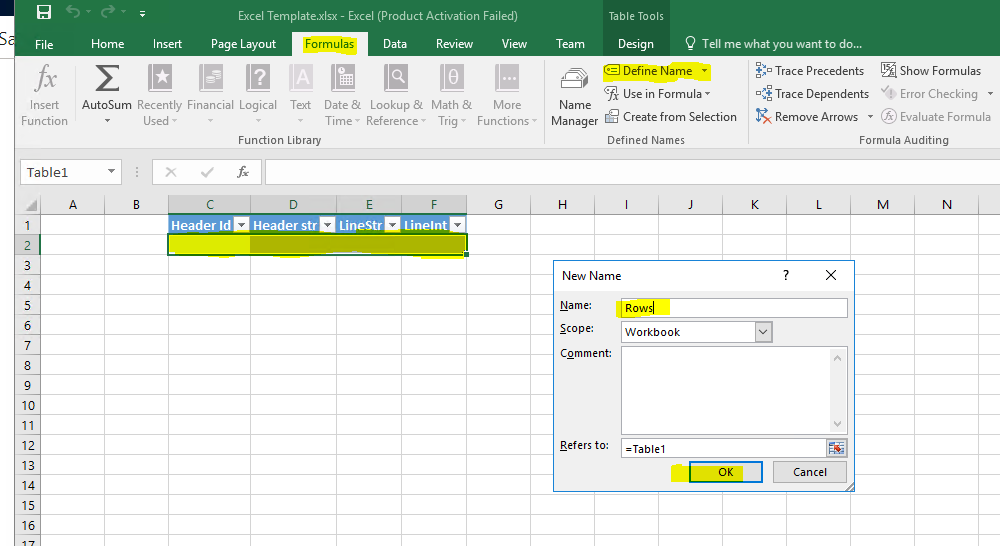
The electronic reporting uses the ranges to know where and how to put the data, it is needed to create ranges at field level too:
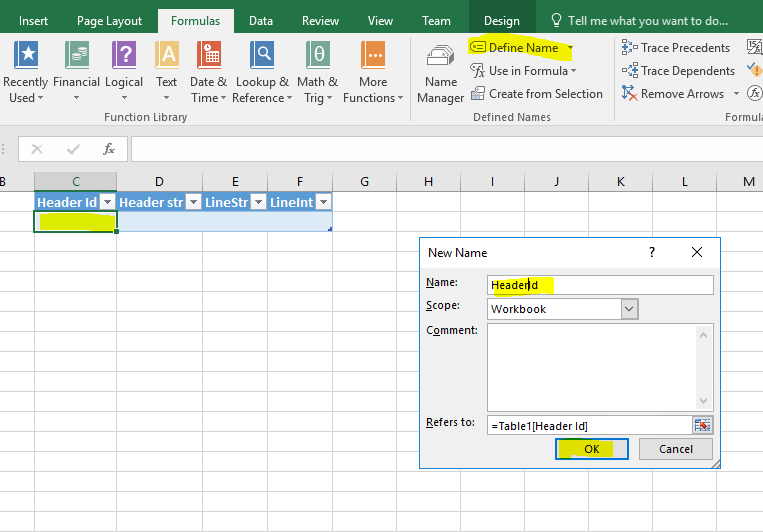
We have to do it for every field, and after that, if we import it to the format, we are going to see how the structure of our format is going to be automatically created… isn’t it awesome?
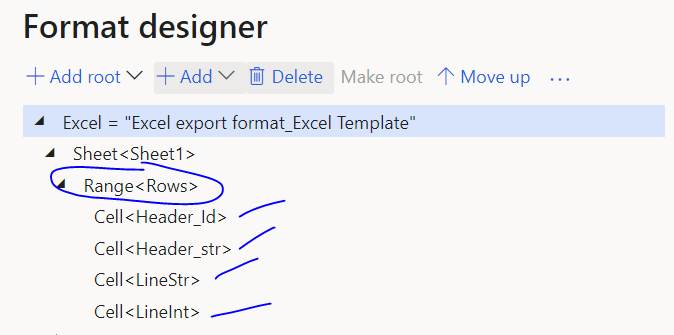
If we want to add new fields here, we can change the excel and import again, clicking in update from excel. It’s important to understand that the version of the latest excel you imported, is the one that will determine the ranges used here, so a mismatch between the attachment excel and the ER format will cause errors.
Now the only step missing is to bind with our Model, and job done!
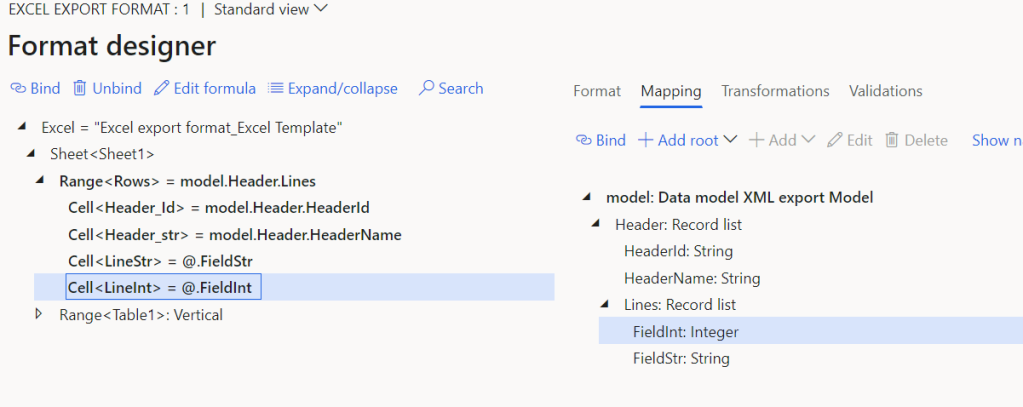
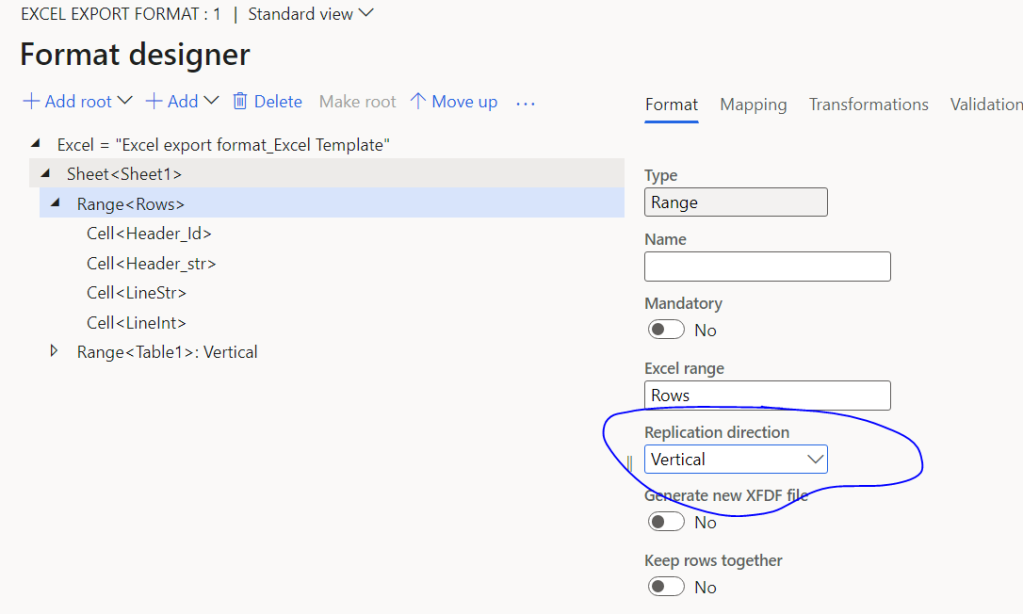
It is very important to set the property Replication Direction to our range “Rows” to vertical, that will allow this range to be bound to a record list with a specific multiplicity and to create several lines in our Excel file, that’s why I could bind it with the lines:
If we execute the ER now, this is the result:
Nice and Smooth! You can see how easy is to work with Excel format in GER once you know the ranges trick! Many thanks if you read until here, and see you in the next post!